Shop-Built Belt Sander
Season 17 Episode 1704 | 26m 46sVideo has Closed Captions
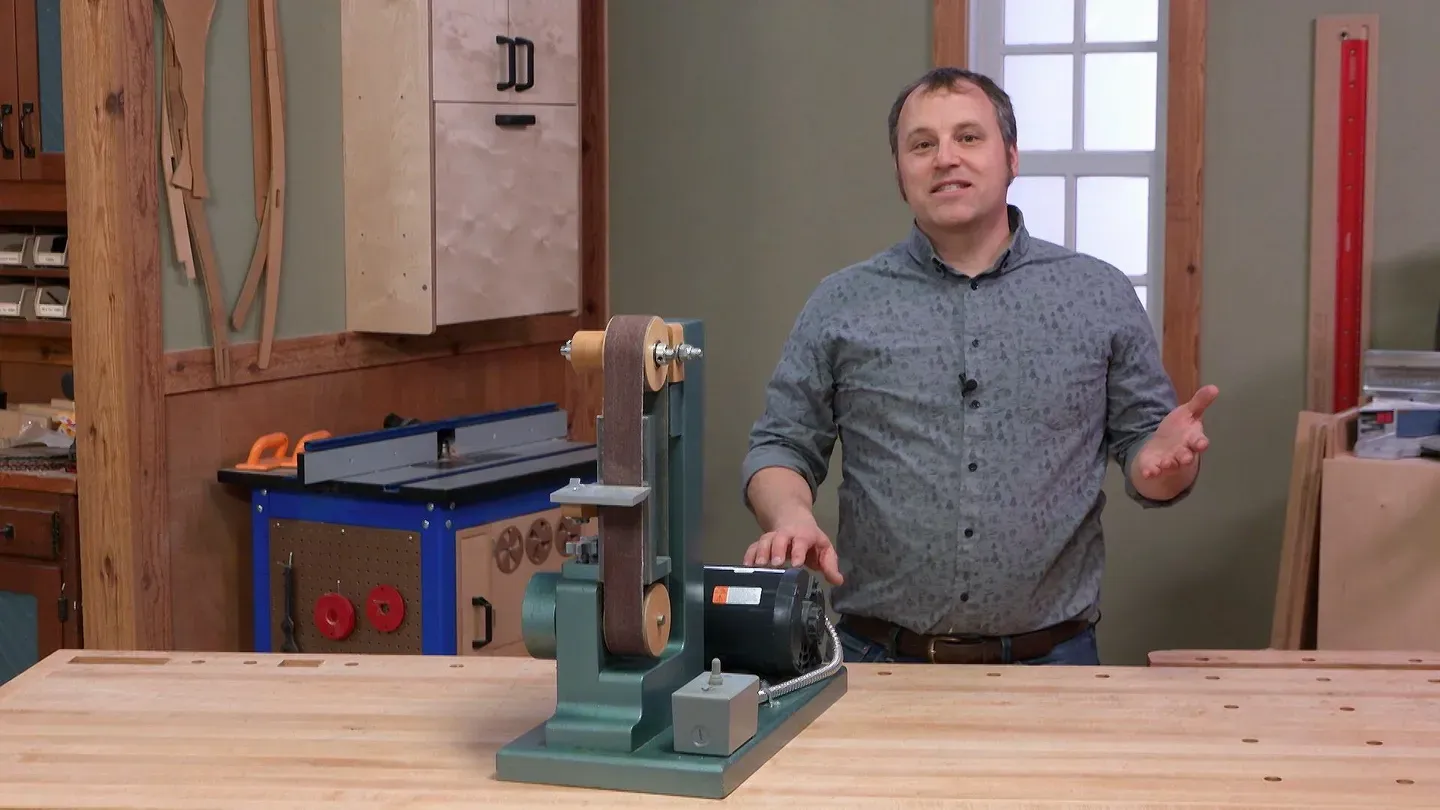
Build a narrow belt sander that works great and won’t cost a lot of money to build.
A narrow belt sander is a multipurpose tool that’s ideal for woodworking tasks as well as metalwork. Learn how this clever design uses simple construction to build a tool that works great and won’t cost a lot of money to build.
Problems with Closed Captions? Closed Captioning Feedback
Problems with Closed Captions? Closed Captioning Feedback
Woodsmith Shop is a local public television program presented by Iowa PBS
Shop-Built Belt Sander
Season 17 Episode 1704 | 26m 46sVideo has Closed Captions
A narrow belt sander is a multipurpose tool that’s ideal for woodworking tasks as well as metalwork. Learn how this clever design uses simple construction to build a tool that works great and won’t cost a lot of money to build.
Problems with Closed Captions? Closed Captioning Feedback
How to Watch Woodsmith Shop
Woodsmith Shop is available to stream on pbs.org and the free PBS App, available on iPhone, Apple TV, Android TV, Android smartphones, Amazon Fire TV, Amazon Fire Tablet, Roku, Samsung Smart TV, and Vizio.
Providing Support for PBS.org
Learn Moreabout PBS online sponsorship♪♪ In the course of building projects on "The Woodsmith Shop" we use a lot of power tools.
But today on "The Woodsmith Shop," what we're gonna do is gonna combine that.
Our project is a power tool.
We're making this belt sander that you can use in your shop.
It's gonna be a low-cost way to get a high-quality tool, and the process is actually really easy.
There's a lot of things to love about this sander.
It's got an adjustable table, the belt changes are quick and easy, and you can use it for all kinds of operations -- for sanding wood parts for your projects, even sharpening and metalworking, as well.
If you're ready to get started on building a project like this, the plans are at our website, WoodsmithShop.com.
It's time to build.
Announcer: Major funding for "The Woodsmith Shop" has been provided by... Announcer: Old Masters, offering wood stains and finishes for the woodworking enthusiast and professional.
Announcer: And by... Announcer: Kreg -- from the first cut to the final assembly, providing woodworkers with products that help to simplify woodworking challenges.
Kreg.
Announcer: Additional funding provided by... Announcer: Titebond wood glues, the pro's advantage.
Announcer: And by... ♪♪ ♪♪ ♪♪ ♪♪ You know, when designing and building a homemade machine, mass and rigidity are very, very important.
They're important because they dampen down any vibration, and they keep the machine from dancing around on the floor of the benchtop.
Now, with a commercial machine, cast iron is the answer.
But for a homemade machine like this, it's layers of plywood.
So, we're gonna start out by gluing three subassemblies together.
First off, the base, which is two layers of plywood.
Then this section here, which is the bearing block.
And finally, this section in the rear, which we're calling the post.
They are each composed of three layers of plywood.
I've got all my parts roughed out, oversize, so time for glue, time for clamps.
And once we're done with that, we can start laying things out and shaping them.
With all our parts out of the clamps, I then took them to the table saw and trimmed things up to their final size.
So I've got the bearing block, I've got the post, and I've got the base here.
Well, what's next?
What's next is some layout work.
If you can see here, I've got all the lines that show the exterior shape of the bearing block.
I've got some circles drawn to note the radius, because all of our corners here have a nice, half-inch radius.
And I also have an "X" up here.
And that "X" is where the shaft and the bearings are going to go.
They're gonna make the sander go.
Here we have the block for the post.
I'm gonna go ahead and hold it up.
You can see the shape here and how that mirrors the post of our finished sander.
Once again, I've drawn the radiuses in.
We're applicable.
So, over at the drill press, I'm gonna end up drilling a 5/8" hole for clearance of our shaft, and then I'll do a counterbore for each bearing, and that'll be on both sides.
I'm also gonna drill out the radius for the inside corners of each of these blocks.
And that way, when I go to the bandsaw, I can just cut right up into those radiuses, and I'll get a nice, smooth transition.
In order to make my cuts a little cleaner, I'm going to use a fence to get a nice, smooth cut all the way down here to my fillet hole.
'Cause you know what a smooth cut means.
Less sanding later on.
And I'm no fan of sanding.
So, with the fence set, let's go ahead and start cutting.
We're moving right along with our project.
Let me show you what I've been up to.
If you notice here on the base, I've added a 3/8" roundover around all the edges.
And I've drilled eight holes that are countersunk on the back, and these are going to attach the bearing block and post assembly.
My bearing block has been routed.
I also went ahead and added two threaded inserts that you see up top here.
Those attach the platen assembly that you see here on our finished sander.
The post was also rounded over in key spots, and I drilled a hole up here.
This hole up top of the post accepts a bolt for the tracking mechanism for our sander.
I also did a little bit of extra sanding to feather in my bearing block and the post block, 'cause a little bit of extra effort now is gonna make the paint finish all that much better later on.
Well, with everything done, it's time to go ahead and glue and screw the post bearing assembly down to our base.
So I'm gonna put a little glue on the bottom... and some layout lines here that I'm following.
I'll put it in position.
And I'm gonna go ahead and just clamp it in place temporarily until I get my first screw or two in place to hold it.
♪♪ ♪♪ Alright.
That completes our basic assembly of the post, the bearing block, and the base.
It's solid, it's strong, and now it's time to move on to the platen, the tracking, and the motor and all those good things.
So, now that Chris has the base of our sander all put together, we can start working on some of the mechanicals.
And it starts with this pivot block that I just screwed in place.
This is gonna allow a point for our pivot arm to press against to adjust tracking on the belt once everything's all assembled.
And we can see that here on the finished piece.
This knob will rotate, and that levers against that block that I just installed.
And that tilts this entire pivot assembly to help you align the belt and keep it on track as it's running.
So, now we're gonna work on the pivot arm.
We're gonna do that by starting with a blank, and we're gonna head over to the drill press and drill a few holes before we cut it to shape.
So, this pivot arm gets three different holes -- one for the pivot point, one to attach it to the arm, and then one for the actual adjustment knob.
Two of these holes are 1/2" diameter and one is 3/8".
Now, we're not gonna really worry about that 3/8" one just yet.
We are gonna drill that with a smaller hole first, just to locate it before we shape the rest of this assembly.
So, I went ahead and set up a 1/2" Forstner bit.
So we'll drill these holes, and we'll drill that small 1/8" hole.
So, now that we have our holes drilled, we can go ahead and cut this guy to shape.
I'm simply gonna do that here at the bandsaw.
Once I'm done cutting it to shape, I'm gonna finish these holes.
This one's a 3/8" through hole.
But before I drill that one, on the backside, I'm gonna create a 7/8" counterbore.
That will be for a T-nut for that adjustment knob to thread into.
So, now we can go in and start assembling this pivot assembly.
First thing I'm gonna do is install a T-nut in that counterbore I just drilled with the drill press.
We're just gonna hammer that in place.
Want to make sure it's below the surface.
And that T-nut is gonna be for this adjustment knob.
And now when we bring our base back in, you can see that that is going to press against that block, and it's gonna cause this whole thing to tilt.
Now, of course, the next thing we need to do is figure out how to connect this to this post.
To do that, we're gonna use a bolt, and we're gonna thread it right into that hole that Chris drilled.
So, now we have to start working on the pivot arm that actually has the wheels on it.
So, our pivot arm consists of two parts.
First is this arm here, and then we have this second, round support block.
That support block is gonna get cut out and glued on the face here, so this radiused end will be double thick.
It's just gonna add a little bit more support to the shaft that's gonna support our rollers.
So, what I'm gonna do here at the bandsaw is first cut this guy free, making sure I stay on the outside of the line.
Then I'll go and cut this guy to shape, and then I'll glue this on.
And we'll fine-tune everything with some sandpaper or maybe the belt sander.
Okay.
So, now that the glue on this pivot arm is dried, I went ahead and smoothed this out.
And really all I'm doing here is I'm blending the two shapes together.
I just want to make sure it's nice and smooth and it looks good.
So, now we have to head over to the drill press and drill a couple holes.
If you remember, we drilled that 1/4" hole that's gonna hold the spring in a little bit.
But now we have to drill a 1/2" hole for the pivot and for the shaft.
So, before we put everything together for the belt-tracking mechanism, we need to actually make the rollers that the belt's gonna ride on.
Now, those rollers are made of three layers of plywood.
I start those off as square discs, and I've glued them together, and I've drilled a through hole.
Now, there's two different rollers here.
They're both the same diameter, but this one gets a pair of bearings recessed into its face, so I drill those counterbores.
The other roller is just gonna have a simple hole on edge, and that's gonna be for a set screw to attach it to the shaft.
So now we can go ahead and turn this around.
What I'm gonna do is I've already pinched this in a bolt using a pair of nuts and washers.
And now I'm gonna hold it in the Jacobs chuck.
So, that's gonna drive our roller assembly.
And now we'll bring up the tailstock.
And in this live center, I removed the center point.
So this is just a cone right now.
And that will just help stabilize the head of that bolt as we're turning it.
Now it's a simple matter of turning this around.
And one thing I will point out is as I'm turning this, I'm not gonna leave this as a square cylinder.
Instead, we want this to be crowned a little bit, kind of like a car tire.
If this was a perfect cylinder, it'd be really hard to control the tracking of the belt.
And by adding a simple crown, we'll be able to control where that belt rides.
So, the final thing to do on these rollers is gonna be to tap this hole that we drilled before we started everything.
And I did that with one of those wood taps, just like we did up here when we installed this bolt.
So, now this set screw threads nice and snuggly through that hole.
And that's gonna be to attach it to our drive shaft in a little bit.
But now we're at a point where we can start assembling a lot of this.
So, we've already installed this pivot block, and I simply threaded in that bolt into that threaded hole we cut.
And then it pivots off of this knob on the back, and that's all working fine and dandy.
So, now let's bring this pivot arm into here.
This pivot arm gets an eyebolt through the end, and we'll cap that with a washer and a nut.
And we'll hook up the spring after we get everything done.
So, now we can go ahead and slide this bolt into place.
We're gonna use some washers, just to space everything out so nothing rubs together.
And then we'll cap it off with a locknut.
There we go.
We want it snug, but we want it to still be able to move.
So, now we can go ahead and add our spring.
That spring just goes out into this little eye screw that I already installed.
And there we go.
That adds tension to that entire assembly.
So, now let's go ahead and add our top roller.
The top roller gets a pair of bearings.
Press into those counterbores.
They should slide in there nice and neat.
There we go.
And now this entire assembly can come up here.
We'll install a drive shaft.
Use a little persuasion.
Okay.
So, now that roller slides right onto that shaft.
Get past the head of that bolt.
And then, on this back side, we just have a stop collar with a set screw.
So we'll tighten that down.
And then we have one more stop collar that goes on this side with the washer.
There we go.
That moves freely.
So now for the drive roller.
This drive roller sets on this shaft.
And I've went ahead and taken this over to the bench grinder and just ground a couple of flats in there.
Those flats are for that set screw that's on this drive roller, as well as the pulley that we'll add in a minute.
So let's go ahead and get this guy started on here.
Okay.
And we'll tighten that down.
There we go.
Then we'll add a washer and send it through those bearings.
There we go.
Now, that set screw is gonna hold it on the shaft, so we don't need a stop color on this drive side.
And then on this backside, we're gonna add a washer, and then we're gonna add a pulley.
Now, that pulley is gonna attach to the motor that Phil will add in a little bit.
And with that, we're ready to hand it off to Phil for some power.
We're almost ready to wire up our sander, but there are a few other parts that we need to make.
And that has to do with the tool rest and the backer, or the platen, for our belt sander.
Now, I have the tool-rest arm here that I've made out of some solid maple.
What I need to do now is I'm gonna form a slot along the face of it that's going to allow the tool rest to adjust in and out, depending on the workpiece that you're doing.
I'm doing that here at the drill press.
I've set up a bit.
And because of the shape of this, the slot is parallel with this tapered edge.
So I cut this piece to size first, and now I can drill a series of very nearly overlapping holes along the length of the slot.
And we'll head back to the bench and use a chisel and some files and clean up the edges of the slot.
Before I step away from the drill press, there's two more holes that I need to make, and that's for attaching the tool rest to this arm.
Now, what I want to do on the bottom side here is create a couple of counterbores with a Forstner bit here.
And that'll give a flat spot for some washers to rest against.
Then I'll quick-swap out the bits and drill the through holes for the screws.
Alright.
For this tool rest arm, I want to clean up the slot.
So I've drawn in some pencil lines here that I'm gonna use as a guide for my chisel to straighten up the edges.
So I can just align the chisel right on those lines... and then tap my way about halfway through the thickness of the arm.
Then I can flip this over, work from the other side, and then have a nice, smooth slot as a result.
Then we can start tackling the other portions of the tool rest and platen assembly.
Next up on our to-do list is to create the platen that backs up the sanding belt.
And that provides a little resistance so you can get nice, square edges.
Now, that's a three-part assembly.
There's a base piece that I've already formed.
It has a couple of short slots that will be used to attach this to the sander.
I drilled out the ends of the slots at the drill press.
Then with a handful of cuts at the bandsaw, I kind of connected the dots and cleaned those up and then added a radius to the outside corners, just for a little pizzazz there.
On the front of it, there's gonna be an L-shaped assembly so that you have this backer piece that the platen gets attached to.
And then there'll be an intersecting piece on the backside that adds some rigidity.
And it's also where the arm is that we just got done making where the tool rest is gonna go.
So, now, these two pieces are joined with a tongue-and-groove joint.
So what I'm gonna do is I've set up here at the table saw, put in a dado blade.
And I'm gonna run a groove on the backside of this backer piece.
Then, on the mating piece, we'll adjust the saw and cut a tongue with a sacrificial fence.
Once the joinery is taken care of on these two pieces, there's just a couple other details to address.
The first is to cut a slot on the brace piece.
I did that the same way as I've done before -- just drilled multiple holes and cleaned things up with a chisel.
Then I cut a taper on the back edge, just to add a little sparkle there, as well.
And now I can glue these two pieces together, and once that's done, we'll join it together with the base.
The tool rest for our sander is a piece of aluminum.
And we have that because it's gonna be rigid enough to support a workpiece.
The aluminum helps keep your workpiece cool, especially if you're working with metal.
The only thing is, is that if you're trying to use it at a high angle, we're gonna need to remove a little bit of material on the backside here, create a bevel.
So I've marked that out with a permanent marker, and I've made a stop cut on the bottom here.
So, what I'm gonna do is bring it over to the vise.
Then, with a hacksaw, I'm gonna remove as much of the waste as I can and then clean things up with a file.
There's several ways of going about it, but this is a way that I found that works with the tools that I have.
There you can see the bevel on the backside doesn't have to be perfect.
Like, I want to do as good a job as I can, but I'm not looking for a machine to surface.
It's just creating some clearance when using this at a higher angle.
So, the tool rest can now be attached to the arm, and that's just done with some flathead machine screws here.
Fit those in.
The washer and a nut.
And then, once this is assembled, we can wrap things up with the platen and then get the motor attached.
Alright.
The platen just gets screwed to the assembly that attaches it to the sander.
Now, one thing I want to point out is there's a slight chamfer on the top edge of the platen here, and that's to just ease the wear and tear on the backside of the belt as it goes sliding across the platen.
Now let's do a little bit of assembly here on the work-holding part of our sander.
So, what I'm gonna do is take a couple of knobs here.
Alright.
The table attaches to this platen assembly like we talked about before with this long slot here.
What I'm gonna do is thread a long bolt and knob to a clamping block that I made.
It's just a piece of three-quarter-inch maple that I've inserted a T-nut in on the backside.
And that's gonna give me a lot of clamping surface to hold that table in place.
So I can just slip that in, put the clamp block back there.
Now, one of the big features of this sander is how easy it is to adjust both the angle of the table and its relative position, depending on the type of workpiece that you have.
So you can even slide the table in and out a little bit and get it locked in right where you want it.
So, what we need to do now is apply some power to this thing, so we're gonna get the motor and the belt hooked up and be ready to turn it on.
Alright.
Here we are, ready to fire things up.
Actually, we fired it up just before we started with the cameras again.
Wanted to make sure that it's working right.
What I did is attach the motor to the back of the platform here so that we had good tension on the belt that drives everything here.
We also wired up a switch so that it's easy to access right from the front there.
So let's see what it looks like.
[ Belt sander whirring ] What I really like about this machine is that it runs pretty smooth and quietly, too.
And belt changes are real easy.
We just push down on this arm, and you can slide belts on and off really quickly so there's no extra wheels or knobs or anything to get in your way.
The final component of our belt sander is to add a belt cover for the drive belt.
And with that, the sander is complete except for a good paint job.
Now, the one that we used originally has a paint that's called a hammered finish.
And it gives it kind of that old-time, wrinkly look to it.
Once you have your sander all painted up, it's ready to be put to use in your shop.
And I'm sure you're gonna find a lot of enjoyment in using a tool that you've made yourself.
If you're ready to build along, the plans for this belt sander are at our website, WoodsmithShop.com.
It's also the place of inspiration for other projects, great woodworking tips and techniques, and more.
And when we're done building the next project, we can meet right back here in "The Woodsmith Shop."
♪♪ ♪♪ If you'd like to get more video tips and techniques, sign up for the free weekly Woodsmith eTip.
Every week you'll receive an e-mail with a video tip to get more out of your table saw, router table, and more.
Sign up at WoodsmithShop.com.
Everything in today's show comes from the newly expanded Woodsmith Guild Edition with shop projects, plans, tips, and techniques.
To get a free preview issue of The Woodsmith Guild Edition and a free Woodsmith book, go to WoodsmithShop.com.
In addition, past seasons of "The Woodsmith Shop" are available on DVD, or you can watch them online from your computer, tablet, or mobile device.
For more information, go to WoodsmithShop.com.
Announcer: Major funding for "The Woodsmith Shop" has been provided by... Announcer: Old Masters, offering wood stains and finishes for the woodworking enthusiast and professional.
Announcer: And by... Announcer: Kreg -- from the first cut to the final assembly, providing woodworkers with products that help to simplify woodworking challenges.
Kreg.
Announcer: Additional funding provided by... Announcer: Titebond wood glues, the pro's advantage.
Announcer: And by... ♪♪ ♪♪


Woodsmith Shop is a local public television program presented by Iowa PBS